Taco Bell Quesalupa: The Ultimate Cheesy Hybrid | by Tyla
Recreate the famous Taco Bell Quesalupa recipe at home! Crispy shell, gooey cheese, and bold flavors make this copycat even better than takeout.
Prep
30 min
Cook
30 min
Total
60 min
Servings
8 servings
Ingredients
Instructions
- 1
In a large bowl, combine Masa Harina and salt. Gradually add warm water, mixing with hands until a soft, pliable dough forms.
- 2
Knead dough gently for 5 minutes until smooth. Cover with damp cloth and let rest for 15 minutes.
- 3
Heat 1 tablespoon vegetable oil in large skillet over medium-high heat. Add diced onion and cook until softened, 3-5 minutes.
- 4
Add ground beef and cook until browned, 8-10 minutes. Drain excess grease.
- 5
Stir in taco seasoning and ½ cup water. Simmer for 5-7 minutes until thickened. Keep warm.
- 6
Divide dough into 8 equal portions. Roll each into a ball.
- 7
Press each ball between parchment paper into a 5-6 inch round.
- 8
Sprinkle 2 tablespoons Monterey Jack and 2 tablespoons cheddar cheese over one half of tortilla.
- 9
Fold other half over cheese, pressing edges to seal.
- 10
Heat 1 inch vegetable oil in skillet to 350-375°F (175-190°C).
- 11
Fry shells 2-3 minutes per side until golden brown and crispy.
- 12
Drain on paper towels and sprinkle with salt.
- 13
Take warm cheesy chalupa shell.
- 14
Spoon ground beef filling into center.
- 15
Top with lettuce, tomato, sour cream, and other desired toppings.
- 16
Serve immediately.
Notes
Tips for Success
- Perfectly crispy, cheesy shell
- Savory ground beef filling
- Fresh, customizable toppings
- Better than the original Taco Bell version
Common Mistakes to Avoid
- Can become soggy if not served immediately
- Cheese may burst out during frying if overfilled
- Requires careful oil temperature control
- Shells may crack if dough is too dry
Nutrition (per serving)
450-550 kcal
Calories
Remember that feeling when Taco Bell first dropped the Quesalupa? That moment of pure, cheesy bliss when you bit into a crispy chalupa shell, only to discover it was infused with an extra layer of glorious, melty cheese? It was a game-changer, a crunchy, gooey sensation that left a lasting impression on our taste buds and cemented its place in the pantheon of legendary fast-food innovations. But like many fleeting culinary dreams, the Taco Bell Quesalupa disappeared, leaving a void in the hearts of cheese and taco lovers everywhere. If you’ve been yearning for that unique cheesy crunch and savory filling, you’ve come to the right place. We’re about to embark on a delicious journey to recreate the iconic Taco Bell Quesalupa at home, making it even better than you remember!
Table of Contents
This isn’t just about recreating a discontinued item; it’s about elevating it. We’ll dive into the secrets of achieving that perfectly crispy, cheesy shell, crafting a savory ground beef filling, and layering on all the fresh toppings that make every bite an explosion of flavor. Forget waiting for Taco Bell to bring it back (though many are still pleading for its return, as noted by Allrecipes’ passionate plea to bring back the Quesalupa). With this homemade quesalupa recipe, you’ll be able to satisfy your cravings any time you want, with ingredients you control, and a freshness that simply can’t be beaten. Get ready to impress your friends and family with this ultimate cheesy hybrid!
Ingredients
To master the Taco Bell Quesalupa at home, you’ll need a few key components. The magic truly happens in the cheesy chalupa shell, so pay close attention to the ingredients for that!
For the Cheesy Chalupa Shells (makes 8 shells):
- 1 ½ cups Masa Harina (fine corn flour, essential for texture!)
- 1 cup warm water (plus more if needed, for dough consistency)
- ½ teaspoon salt
- 2 tablespoons vegetable oil (or canola oil, for frying the shells)
- 1 cup shredded Monterey Jack cheese (or a Mexican blend, key for that melty factor!)
- 1 cup shredded mild cheddar cheese (for flavor and color)
For the Ground Beef Filling:
- 1 pound lean ground beef (80/20 is a good balance of flavor and leanness)
- 1 tablespoon vegetable oil
- 1 small onion, finely diced (adds a subtle sweetness and depth)
- 1 packet (1 ounce) taco seasoning mix (or your favorite homemade blend)
- ½ cup water
For the Toppings (customize to your heart’s desire!):
- ½ cup sour cream
- ½ cup shredded lettuce
- 1 medium tomato, diced
- 1-2 jalapeños, sliced (fresh or pickled, for a kick!)
- ¼ cup finely diced red onion
- 1 lime, cut into wedges (for serving)
- Hot sauce (optional, but highly recommended!)
- Extra shredded cheese (because why not?)
Ingredient Notes:
- Masa Harina: This is not cornmeal! It’s a specific type of corn flour used for tortillas and tamales, giving your chalupa shells the authentic texture and flavor. Don’t skip it!
- Cheese: A blend of Monterey Jack and cheddar gives you the best of both worlds—stretchiness from the Jack and classic flavor from the cheddar. Feel free to experiment with pepper jack for more heat.
- Ground Beef: You can easily swap ground beef for ground turkey, chicken, or even a plant-based crumble for a vegetarian option. Just adjust cooking times accordingly.
- Taco Seasoning: Store-bought works perfectly, but if you’re feeling adventurous, mix your own with chili powder, cumin, garlic powder, onion powder, paprika, and a pinch of cayenne.
Timing
Let’s break down the time commitment for your delicious homemade quesalupa:
- Prep Time: 30 minutes (Dicing veggies, shredding cheese, mixing dough, prepping beef)
- Cook Time: 25-30 minutes (Cooking beef, frying shells)
- Total Time: 55-60 minutes
Time-Saving Tips:
- Prep Ahead: You can cook the ground beef filling a day or two in advance and store it in the fridge. Reheat gently before assembling.
- Pre-Shredded Cheese: While block cheese you shred yourself often melts better, pre-shredded cheese is a massive time-saver for the shells and toppings.
- Mise en Place: Get all your ingredients measured, chopped, and ready before you start cooking. This “everything in its place” approach makes the process much smoother and faster.
- Enlist Help: Make it a family affair! One person can chop veggies, another can mix the dough, and another can handle the frying. Many hands make light work!
Step-by-Step Instructions
Alright, let’s get cooking! Follow these steps carefully to create your very own, show-stopping Taco Bell Quesalupa.
1. Prepare the Cheesy Chalupa Dough:
- In a large bowl, combine the Masa Harina and salt. Gradually add the warm water, mixing with your hands until a soft, pliable dough forms. It should be moist but not sticky. If it’s too dry, add a tiny bit more water; if too wet, a sprinkle of Masa Harina.
- Knead the dough gently for about 5 minutes until smooth. Cover the bowl with a damp cloth and let it rest for 15 minutes. This helps the masa hydrate properly.
2. Cook the Ground Beef Filling:
- While the dough rests, heat 1 tablespoon of vegetable oil in a large skillet over medium-high heat. Add the diced onion and cook until softened, about 3-5 minutes.
- Add the ground beef to the skillet. Break it up with a spoon and cook until browned, about 8-10 minutes. Drain any excess grease.
- Stir in the taco seasoning and ½ cup water. Bring to a simmer, then reduce heat to low and let it cook for 5-7 minutes, allowing the flavors to meld and the sauce to thicken slightly. Keep warm.
3. Form and Fry the Cheesy Chalupa Shells:
- Divide the Masa dough into 8 equal portions. Roll each portion into a smooth ball.
- Place one dough ball between two pieces of parchment paper or plastic wrap. Using a tortilla press or a flat-bottomed plate, press the dough into a 5-6 inch round. The edges might crack a little, which is okay.
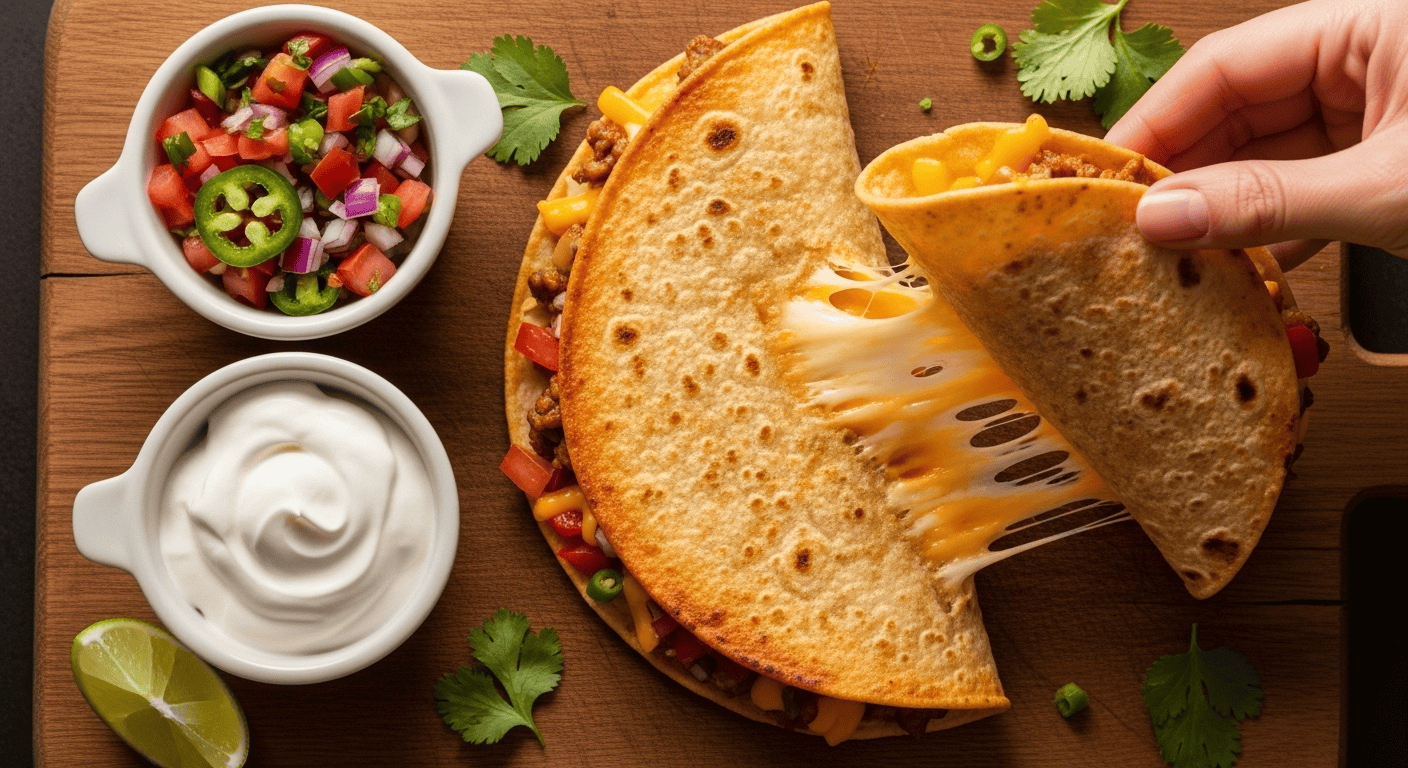
- Carefully peel off the top piece of parchment/plastic. Sprinkle about 2 tablespoons of Monterey Jack cheese and 2 tablespoons of cheddar cheese evenly over one half of the tortilla.
- Fold the other half of the tortilla over the cheese, gently pressing the edges to seal. This is your cheesy pocket!
- Heat about 1 inch of vegetable oil in a deep skillet or Dutch oven over medium-high heat (350-375°F / 175-190°C).
- Carefully place one cheesy chalupa shell into the hot oil. Fry for 2-3 minutes per side, or until golden brown and crispy, and the cheese inside is visibly melted and bubbly. The shell should puff up slightly.
- Using tongs, remove the shell and place it on a plate lined with paper towels to drain excess oil. Immediately sprinkle with a pinch of salt. Repeat with the remaining shells.
4. Assemble Your Quesalupas:
- Take a warm, crispy, cheesy chalupa shell.
- Spoon a generous amount of the seasoned ground beef filling into the center.
- Top with shredded lettuce, diced tomato, sour cream, and any other desired toppings like jalapeños, red onion, or hot sauce.
- Serve immediately and enjoy your homemade cheesy chalupa recipe masterpiece!
Healthier Alternatives for the Recipe
Enjoying your favorite comfort foods doesn’t always have to mean sacrificing your health goals. Here are some simple ways to make your Taco Bell Quesalupa a little lighter and even more nutritious:
- Leaner Protein: Swap out traditional ground beef for extra-lean ground turkey or chicken breast, finely minced. You’ll still get a great texture and flavor with less saturated fat. For a plant-based option, use seasoned black beans, lentils, or a meatless crumble.
- Whole Wheat Masa Harina: While harder to find, some brands offer whole wheat Masa Harina, adding more fiber to your shells. Alternatively, you can mix a small amount of whole wheat flour into regular Masa Harina (start with 1-2 tablespoons per cup of masa) to boost fiber without drastically changing the texture.
- Baking/Air Frying the Shells: Instead of deep frying, you can try baking or air frying your chalupa shells. To bake, brush both sides of the pressed, cheese-filled dough with a little oil and bake at 400°F (200°C) for 8-10 minutes per side, or until golden and crispy. For air frying, preheat to 375°F (190°C), lightly brush with oil, and air fry for 4-6 minutes per side. They might not get quite as puffy or crispy as fried, but they’ll still be delicious and significantly lighter.
- Reduced-Fat Cheese: Use reduced-fat Monterey Jack and cheddar cheese. They still melt well and contribute to the cheesy goodness without as much fat.
- Greek Yogurt instead of Sour Cream: Plain Greek yogurt (full-fat or low-fat) makes an excellent, protein-rich substitute for sour cream. It offers a similar tangy creaminess.
- Load Up on Veggies: Double down on the fresh toppings! Add bell peppers, corn, black olives, or even some finely shredded cabbage to bulk up the nutritional content and add extra crunch. Consider adding a vibrant salsa instead of just diced tomatoes for more flavor and nutrients.
Serving Suggestions
The beauty of a homemade quesalupa lies in its versatility and how it complements a meal. Here are some ideas to make your Quesalupa feast complete:
- The Classic Way: Serve it exactly as Taco Bell intended – fresh, hot, and piled high with all your favorite toppings. A squeeze of fresh lime juice truly brightens everything up!
- Pair with Other Taco Bell Favorites: Since you’re already in a copycat mood, why not whip up a few other classics? Our recipe for a Taco Bell Cheesy Street Chalupa makes a great companion, offering a different take on the chalupa experience. And for those who love a bit of crunch, our Taco Bell Doritos Locos Taco recipe would be a fantastic addition to the spread.
- Side Dishes:
- Mexican Rice: A classic side that soaks up all the delicious juices.
- Refried Beans: Creamy and savory, a perfect complement.
- Corn Salad: A light and refreshing side with fresh corn, cilantro, red onion, and lime.
- Guacamole & Chips: You can never go wrong with fresh guacamole and a basket of crispy tortilla chips for dipping.
- Beverage Pairings:
- Agua Frescas: Hibiscus (Jamaica) or horchata would be wonderfully refreshing.
- Cold Beer: A crisp Mexican lager or even a lighter IPA pairs well with the savory flavors.
- Margaritas: If it’s a party, a classic margarita or a spicy jalapeño margarita is always a hit!
- Breakfast Quesalupa: Got leftover shells? Fill them with scrambled eggs, breakfast sausage or chorizo, cheese, and a dollop of salsa for an amazing morning treat!
Common Mistakes to Avoid
Making your own cheesy chalupa recipe at home is fun, but a few pitfalls can hinder your success. Here’s what to watch out for:
- Using the Wrong Flour: Masa Harina is crucial. Do NOT substitute with regular cornmeal or all-purpose flour. They have different textures and gluten structures and will not give you the right chalupa shell consistency or puff.
- Overworking the Dough: While you want a pliable dough, over-kneading masa can make it tough. Gently knead until just smooth, then let it rest.
- Not Resting the Dough: The 15-minute rest period for the masa dough isn’t optional. It allows the masa to fully hydrate, resulting in a more pliable dough that’s easier to work with and less prone to cracking when pressed.
- Oil Temperature is Too Low/High:
- Too Low: Your shells will absorb too much oil, becoming greasy and soggy, not crispy.
- Too High: The outside will brown too quickly, potentially burning, while the inside cheese might not melt properly, and the shell won’t cook through. Aim for 350-375°F (175-190°C) and use a thermometer if you have one.
- Overfilling the Shells Before Frying: When you fold the cheese into the dough, don’t use too much or try to cram it in. It’ll be hard to seal, and the cheese might burst out during frying, making a mess and possibly burning.
- Not Draining Excess Grease: After frying, immediately transfer the shells to a paper towel-lined plate. This helps absorb any extra oil, keeping your shells delightfully crispy and not greasy.
- Skipping the Salt After Frying: A light sprinkle of salt right when the shells come out of the oil enhances their flavor and is a pro move for any fried food.
- Not Seasoning the Beef Properly: Don’t skimp on the taco seasoning. The beef is a core flavor component, so ensure it’s well-seasoned and cooked down to a flavorful consistency.
- Not Sealing the Cheese Pocket Properly: When folding the dough over the cheese, press the edges firmly but gently. This prevents the cheese from escaping during frying. Some early attempts at copycats (like this one from Poor Couple’s Food Guide) often highlighted the challenge of keeping that cheese perfectly encased, so take your time here!
Storing Tips for the Recipe
To enjoy your Taco Bell Quesalupa for longer or get a head start on meal prep, here’s how to store each component:
- Cooked Ground Beef Filling:
- Refrigerator: Store in an airtight container for up to 3-4 days.
- Freezer: For longer storage, freeze the cooled beef in an airtight freezer-safe bag or container for up to 3 months. Thaw overnight in the refrigerator before reheating.
- Chalupa Shells (without cheese):
- You can make the plain chalupa shells ahead of time. Once fried and cooled, store them in an airtight container at room temperature for up to 2 days, or in the refrigerator for up to 5 days. Reheat in a toaster oven or air fryer to crisp them up before filling.
- Cheesy Chalupa Shells (with cheese):
- These are best enjoyed fresh, as the cheese is at its optimal melty state right after frying. However, if you have leftovers, store them in an airtight container in the refrigerator for 1-2 days.
- Reheating: To reheat, place them in a toaster oven or air fryer at 350°F (175°C) for 5-8 minutes, or until warmed through and re-crisped. Microwaving is not recommended as it will make them soggy.
- Toppings:
- Store individual toppings (shredded lettuce, diced tomatoes, sour cream, salsa) in separate airtight containers in the refrigerator. They generally last for 3-5 days, depending on the freshness of the ingredients.
- Assembled Quesalupas:
- It’s best to assemble Quesalupas just before eating. Once assembled, the moisture from the fillings and toppings can make the shell soggy. If you must store an assembled Quesalupa, it will be best for only a few hours in the fridge and eaten cold or quickly reheated (accepting the shell won’t be as crispy).
Troubleshooting Common Issues
Even seasoned cooks run into hiccups. Here’s how to troubleshoot some common problems you might encounter while making your homemade quesalupa:
- Chalupa Shells are Soggy/Greasy:
- Issue: Oil temperature was too low, or shells weren’t drained properly.
- Fix: Ensure your oil is at the correct temperature (350-375°F / 175-190°C) before frying. Use a thermometer. After frying, immediately transfer shells to a wire rack over paper towels to allow excess oil to drip off. Don’t overcrowd the pan, as this lowers the oil temperature.
- Shells are Too Hard/Cracky:
- Issue: Dough was too dry, overworked, or not rested enough.
- Fix: When making the dough, add water sparingly until it’s soft and pliable, not stiff. If your dough is cracking when pressing, it’s likely too dry. Add a tiny bit more warm water and knead briefly. Ensure you give the dough its full 15-minute rest.
- Cheese Bursts Out During Frying:
- Issue: Edges weren’t sealed properly, or too much cheese was used.
- Fix: Don’t overfill the shells. Gently but firmly press the edges of the folded dough together to create a good seal. You can even use the tines of a fork to crimp the edges if needed, but be careful not to poke through the dough.
- Shells Don’t Puff Up:
- Issue: Oil temperature might be too low, dough might be too thick, or it wasn’t rested enough.
- Fix: Confirm oil temperature. Make sure your tortillas are pressed to an even 5-6 inch diameter, not too thick. The dough rest helps with puffing. While not every shell will puff perfectly, they should still be delicious!
- Ground Beef Filling is Dry:
- Issue: Cooked too long, or not enough liquid.
- Fix: Ensure you don’t overcook the beef. The ½ cup of water with the taco seasoning helps create a saucy, flavorful consistency. If it’s still too dry, add a tablespoon or two more water or even a little beef broth while simmering.
- Quesalupa Lacks Flavor:
- Issue: Under-seasoned beef, or lacking fresh toppings.
- Fix: Taste the beef filling and adjust seasoning if necessary. Don’t underestimate the power of fresh toppings like lime juice, jalapeños, and hot sauce to elevate the overall flavor profile.
- Chalupa Shells Taste Raw/Undercooked:
- Issue: Not fried long enough, or oil temperature was too low.
- Fix: Fry until golden brown and crispy on both sides. This ensures the masa is fully cooked and the cheese inside is properly melted.
Nutritional Information per Serving
Please note that this is an estimated nutritional breakdown for one Taco Bell Quesalupa, and values can vary significantly based on exact ingredient brands, portion sizes, and preparation methods (e.g., frying vs. baking). This estimate includes the cheesy chalupa shell, ground beef filling, and typical toppings (lettuce, tomato, sour cream, a sprinkle of extra cheese).
- Calories: Approximately 450-550 kcal
- Protein: Approximately 25-35g
- Carbohydrates: Approximately 30-40g
- Fat: Approximately 25-35g (of which 10-15g saturated fat)
- Fiber: Approximately 3-5g
- Sodium: Approximately 700-900mg (can be reduced by making your own low-sodium taco seasoning and controlling salt)
- Key Nutrients: Iron (from beef), Calcium (from cheese), Vitamin A & C (from vegetables).
For a more precise count, especially if you have dietary restrictions, it’s recommended to use an online nutritional calculator with your specific ingredients. Remember, this is a treat meal, and moderation is key!
FAQ
Q: Can I make the chalupa shells ahead of time?
A: Yes, you can make the plain Masa dough shells (without the cheese inside) ahead of time. Once fried and cooled, store them in an airtight container at room temperature for up to 2 days or in the refrigerator for up to 5 days. Reheat them in a toaster oven or air fryer to crisp them up before adding the cheese and filling. However, the true cheesy chalupa shells, with the melted cheese inside, are definitely best enjoyed fresh!
Q: What if I don’t have a tortilla press?
A: No problem! You can use a rolling pin or a sturdy flat-bottomed plate. Just place the dough ball between two pieces of parchment paper or plastic wrap, and press down evenly or roll it out. It might take a little more effort to get a perfectly round shape, but it will work just fine.
Q: Can I use different cheeses for the shell?
A: Absolutely! While Monterey Jack and cheddar give a classic flavor and melt, feel free to experiment. Pepper Jack will add a kick, a good quality Oaxaca cheese will give an incredible stretch, or a blend of your favorite Mexican cheeses will work too. Just ensure they are good melting cheeses.
Q: Is there a vegetarian option for the filling?
A: Yes! You can easily swap the ground beef for a seasoned black bean filling (mash cooked black beans with taco seasoning and a little broth), crumbled plant-based meat alternative, or even a mixture of sautéed mushrooms and bell peppers. Ensure your vegetarian filling is flavorful and holds together well.
Q: How do I get the shells crispy and not soggy?
A: The key is maintaining the correct oil temperature (350-375°F or 175-190°C) and not overcrowding the pan. Fry until golden brown on both sides. After frying, immediately transfer the shells to a paper towel-lined plate or a wire rack to drain any excess oil. A sprinkle of salt right after frying also helps with crispness and flavor.
Conclusion
There you have it—your ultimate guide to recreating the legendary Taco Bell Quesalupa right in your own kitchen! From that perfectly crispy, cheese-infused chalupa shell to the savory seasoned beef and all the fresh toppings, you now possess the power to satisfy that specific, glorious craving anytime you wish. No more wistful longing for a discontinued menu item; you’ve mastered the art of the homemade quesalupa, and dare we say, made it even better.
Whether you’re hosting a taco night, looking for a fun weekend project, or simply treating yourself to some well-deserved cheesy goodness, this recipe promises to deliver. We’re confident that your taste buds will thank you. Now it’s your turn: give this recipe a try, customize it to your heart’s content, and rediscover the magic of this iconic cheesy hybrid. Don’t forget to share your creations with us on social media, and please, leave a review and tell us how your Quesalupa adventure went! For the complete, printable version of this recipe with all the exact measurements, make sure to check out our full Taco Bell Quesalupa recipe here. Happy cooking, and happy eating!