Make-Ahead Lunch Wraps: Easy & Flavorful Meal Prep by Tyla
Perfect make-ahead lunch wraps for busy weeks! Healthy freezer meals ready in minutes. Our meal prep wraps stay fresh and delicious – the ultimate grab-and-go lunch solution.
Prep
20 min
Cook
N/A
Total
40 min
Servings
4-6 servings
Ingredients
Instructions
- 1
In a small bowl, combine softened cream cheese, mayonnaise, and Dijon mustard. Mix until smooth and well combined.
- 2
Ensure tortillas are at room temperature for pliability.
- 3
Shred lettuce, carrots, and prepare other vegetables as needed.
- 4
Place tortilla on clean, flat surface.
- 5
Spread 1-2 tablespoons cream cheese mixture evenly over entire tortilla surface, almost to edges.
- 6
Arrange sliced turkey over cream cheese, leaving 1 inch clear on top edge.
- 7
Sprinkle shredded cheddar cheese over turkey.
- 8
Add layers of shredded lettuce, carrots, cucumber, and red bell pepper.
- 9
Season filling lightly with salt and black pepper.
- 10
Fold in sides of tortilla 1-2 inches.
- 11
Starting from edge closest to you, roll tortilla up as tightly as possible.
- 12
Tightly wrap each individual wrap in plastic wrap, parchment paper, or foil.
- 13
Place wrapped wraps seam-side down in airtight container in refrigerator.
Notes
Tips for Success
- Versatile and customizable fillings
- Perfect for meal prep and busy weeks
- Stays fresh for 3-4 days when properly stored
- Cream cheese spread acts as moisture barrier
Common Mistakes to Avoid
- Can become soggy with wet ingredients
- Over-stuffing makes rolling difficult
- Not suitable for freezing with fresh vegetables
- Cold tortillas can crack when rolled
Nutrition (per serving)
350-400 kcal
Calories
Preparing healthy, delicious lunches shouldn’t feel like a daily chore. If you’re tired of last-minute scrambles or reaching for less-than-ideal options, it’s time to revolutionize your midday meal with the magic of make-ahead lunch wraps. These versatile, flavorful creations are your secret weapon for a stress-free week, offering a perfect blend of convenience, nutrition, and taste. Imagine grabbing a perfectly packed lunch from your fridge, knowing it’s ready to fuel your afternoon without any fuss. That’s the power of smart meal prep!
Table of Contents
Our recipe for make-ahead lunch wraps isn’t just about saving time; it’s about enjoying vibrant flavors and wholesome ingredients that keep you satisfied and energized. We’ll walk you through crafting wraps that stay fresh, avoid sogginess, and truly deliver on taste. Whether you’re packing lunches for work, school, or just an active day out, these meal prep wraps are about to become your new favorite go-to. Let’s dive into making your lunch breaks something to look forward to!
Ingredients
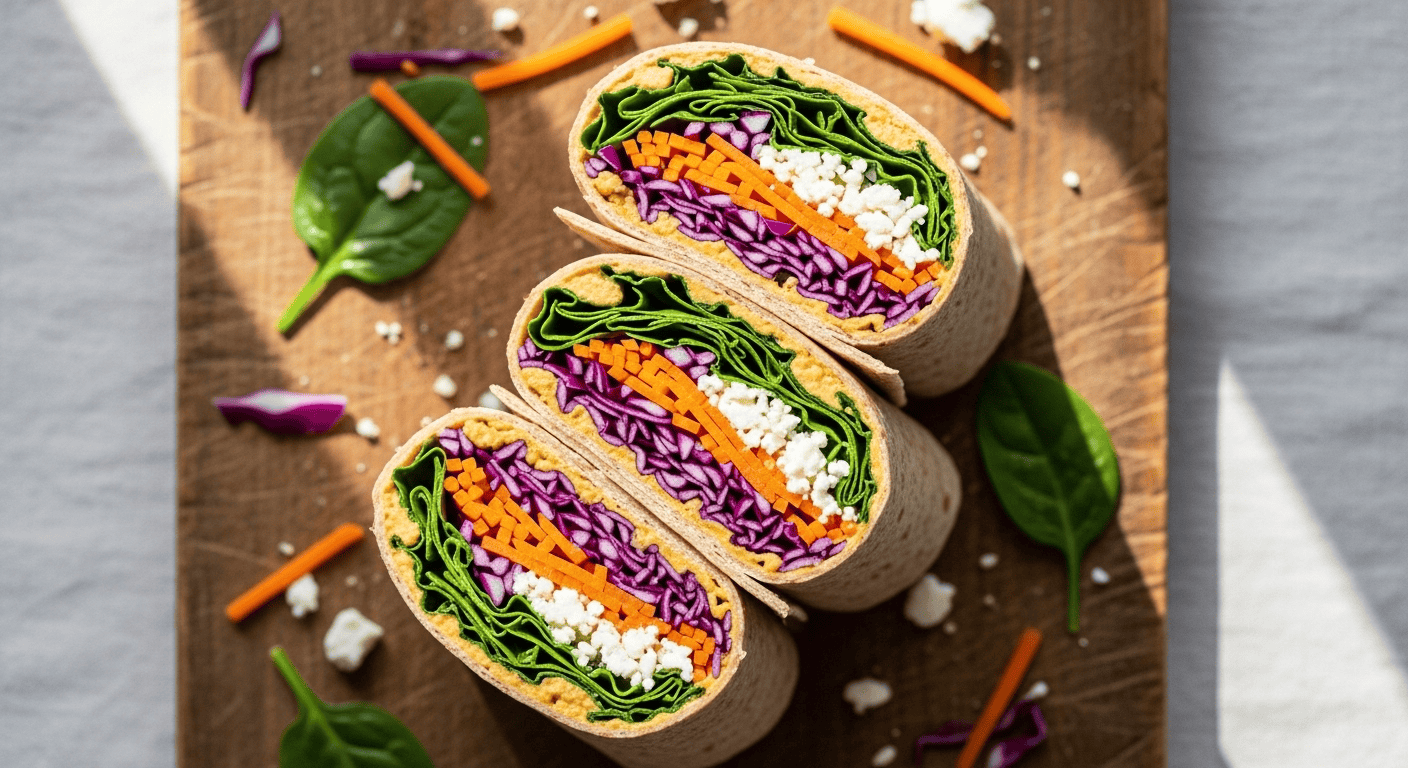
Creating fantastic make-ahead lunch wraps starts with choosing the right ingredients. Here’s a detailed list with notes to help you pick the best for flavor and longevity. This recipe focuses on a classic turkey and veggie wrap, but feel free to customize!
- Large Flour Tortillas (8-10 inches): Choose a good quality, pliable tortilla. Whole wheat or spinach tortillas work great for added fiber and color. Their size is key for holding plenty of filling without tearing.
- Sliced Turkey Breast (1 lb): Opt for low-sodium, good-quality deli turkey. Smoked turkey or rotisserie chicken can also be fantastic substitutes for different flavor profiles.
- Cream Cheese (4 oz, softened): This acts as a delicious “glue” and moisture barrier. Low-fat cream cheese is fine. For a dairy-free option, use a plant-based cream cheese spread or hummus.
- Mayonnaise (2 tbsp): Adds creaminess and helps spread the cream cheese mixture. Avocado oil mayo is a great choice.
- Dijon Mustard (1 tsp): A little tang goes a long way to brighten the flavors.
- Shredded Cheddar Cheese (1 cup): Or your favorite cheese like Monterey Jack, provolone, or Swiss. Shredded cheese distributes more evenly.
- Lettuce (2 cups, finely shredded or chopped): Romaine or green leaf lettuce works best, as they tend to stay crisp longer than iceberg. Finely shredding it helps prevent large watery pieces.
- Carrots (1 cup, shredded): Adds a lovely crunch and sweetness.
- Cucumber (1/2 cup, thinly sliced or julienned): For refreshing crispness. If you’re worried about moisture, pat slices dry before adding.
- Red Bell Pepper (1/2 cup, thinly sliced or diced): Adds color, crunch, and a sweet, mild flavor.
- Salt and Black Pepper to taste: Essential for seasoning your layers.
- Optional Add-ins: Thinly sliced red onion, a sprinkle of everything bagel seasoning, a dash of hot sauce, or a spread of pesto.
Timing
Efficiency is key when it comes to meal prep. These make-ahead lunch wraps are designed to be quick, but a little planning goes a long way.
- Prep Time: 20-25 minutes
- This includes washing and chopping vegetables, preparing the cream cheese spread, and assembling your ingredients. Having everything prepped before you start assembling makes the process smooth.
- Assembly Time: 15-20 minutes
- Once your ingredients are ready, rolling the wraps is surprisingly quick. You can easily assemble 4-6 wraps in this timeframe.
- Total Time: 35-45 minutes
- In under an hour, you can have a week’s worth of healthy, delicious lunches ready to go!
- Time-Saving Tip: Buy pre-shredded carrots and pre-sliced deli meat to cut down on chopping. You can also mix the cream cheese and mayonnaise ahead of time and store it in the fridge. For an even quicker start, try making a larger batch of a filling like our creamy chicken salad recipe over the weekend, and then use it throughout the week in these wraps or on sandwiches.
Step-by-Step Instructions
Let’s get those delicious make-ahead lunch wraps assembled! Follow these steps for perfect, non-soggy results every time.
- Prepare the Cream Cheese Spread: In a small bowl, combine the softened cream cheese, mayonnaise, and Dijon mustard. Mix until smooth and well combined. This creamy mixture will not only add flavor but also act as a barrier to keep your tortillas from getting soggy.
- Lay out Tortillas: Place a tortilla on a clean, flat surface. Ensure it’s room temperature so it’s pliable and easy to roll without cracking.
- Spread the Base Layer: Take about 1-2 tablespoons of the cream cheese mixture and spread it evenly over the entire surface of the tortilla, almost to the edges. This is your first line of defense against sogginess and provides a lovely creamy base.
- Layer the Turkey: Arrange a layer of sliced turkey breast over the cream cheese mixture, leaving about an inch clear on one edge (this will be your top edge when rolling). Don’t overload it, but ensure good coverage.
- Add Cheese and Veggies: Sprinkle about a quarter cup of shredded cheddar cheese over the turkey. Then, add a generous layer of shredded lettuce, shredded carrots, thinly sliced cucumber, and diced red bell pepper. Remember, less watery veggies near the tortilla are key for make-ahead success.
- Season Lightly: Season the filling lightly with salt and freshly ground black pepper.
- Roll Tightly: This is the most crucial step! Fold in the sides of the tortilla first, about 1-2 inches. Then, starting from the edge closest to you (the one with the fillings going all the way to the edge), roll the tortilla up as tightly as possible. A tight roll prevents ingredients from shifting and helps the wrap hold its shape.
- Wrap and Store: Once rolled, tightly wrap each individual wrap in plastic wrap, parchment paper, or foil. This extra layer of protection is vital for freshness and preventing air exposure.
- Chill: Place the wrapped make-ahead lunch wraps seam-side down in an airtight container in the refrigerator. Chilling helps them set and makes them easier to slice if you plan to do so before eating.
Healthier Alternatives for the Recipe
Making these make-ahead lunch wraps even healthier is simple with a few smart substitutions and additions.
- Tortilla Choice: Swap traditional flour tortillas for whole wheat, low-carb, or gluten-free alternatives. Spinach or beet-infused tortillas also add a nutrient boost and vibrant color.
- Leaner Protein: Instead of turkey, consider grilled chicken breast, canned tuna (packed in water), or even seasoned lean ground turkey. For a vegetarian option, use canned chickpeas (mashed with a little mayo/mustard), black beans, or a hearty creamy egg salad sandwich style filling.
- Creamy Base Swaps: Replace cream cheese and mayo with hummus, mashed avocado, Greek yogurt mixed with herbs, or a dairy-free cream cheese alternative. These options add healthy fats, probiotics, or extra protein.
- Boost the Veggies: Don’t be shy about adding more non-watery vegetables. Spinach, kale, sprouts, grated zucchini (squeezed dry), or even finely chopped broccoli slaw mix can increase fiber and nutrients.
- Add Healthy Fats: Sprinkle in some chia seeds, hemp hearts, or thinly sliced almonds for healthy fats and an extra textural element.
- Flavor without Fat: Instead of high-fat sauces, use a squeeze of fresh lemon juice, a dash of your favorite low-sodium spice blend, or a vinegar-based dressing.
Serving Suggestions
Once your make-ahead lunch wraps are ready, the delicious part is figuring out how to enjoy them!
- Classic Lunch: Unwrap and enjoy whole, or slice your chilled wrap into pinwheels for a fun, bite-sized presentation. These are perfect alongside a crisp apple, a handful of grapes, or some baby carrots and a small container of hummus.
- Side Salads: Pair your wrap with a simple green salad dressed with a light vinaigrette. The freshness of the salad complements the heartiness of the wrap beautifully.
- Soup Companion: In cooler weather, a warm cup of vegetable soup or lentil soup makes an excellent companion to a satisfying wrap.
- For the Kids: Cut wraps into “sushi” style pinwheels for a fun, appealing lunchbox item. Use cookie cutters to make fun shapes from the wrap before rolling for a truly kid-friendly meal.
- Dipping Sauce: Offer a side of ranch dressing, honey mustard, or an extra dollop of hummus for dipping.
- Picnic Perfect: These wraps are fantastic for picnics or outdoor adventures. They travel well and stay fresh, making them ideal for grab-and-go meals. For more inspiration on delicious and portable meals, check out this great collection of sandwich wrap recipes that are perfect for any occasion.
Common Mistakes to Avoid
Even seasoned meal preppers can fall into traps when making wraps. Avoiding these common mistakes will ensure your make-ahead lunch wraps are always fresh and delicious.
- Over-Stuffing: It’s tempting to load up on fillings, but too much can make the wrap difficult to roll tightly, leading to tears and a messy eating experience. It also makes the wrap more prone to sogginess.
- Using Too Many Wet Ingredients: Ingredients like sliced tomatoes, watery cucumbers (not patted dry), or excessive dressing can quickly make your tortilla soggy. If using these, place them strategically (e.g., in the middle of other drier ingredients) or add them just before eating.
- Not Creating a Moisture Barrier: Skipping the cream cheese or hummus layer directly on the tortilla is a common mistake. This layer is crucial for protecting the tortilla from the moisture of other ingredients.
- Loose Rolling: A loosely rolled wrap will fall apart, and the fillings will shift. Always roll as tightly as you can from the start.
- Poor Storage: Simply wrapping a wrap in foil isn’t enough. Tightly sealing it in plastic wrap then placing it in an airtight container prevents air exposure, which is the enemy of freshness.
- Cutting Too Soon: Don’t slice your wraps into pinwheels until they’ve been chilled for at least 30 minutes, or ideally, just before serving. This allows the wrap to set and prevents unraveling.
- Ignoring Temperature: Make sure your tortillas are at room temperature. Cold tortillas can crack when rolled, making assembly frustrating.
Storing Tips for the Recipe
Proper storage is the secret to keeping your make-ahead lunch wraps fresh and delicious all week long.
- Individual Wrapping is Key: After rolling, each wrap should be tightly wrapped individually. Use plastic wrap, wax paper, or parchment paper. This creates a barrier against air and moisture loss, and helps the wrap hold its shape.
- Airtight Container: Once individually wrapped, place all your wraps in an airtight container. This provides an additional layer of protection and keeps any lingering fridge odors away from your delicious wraps.
- Refrigeration: Store the container in the coldest part of your refrigerator.
- Layering (Optional): If making a large batch, you can stack them, but place a piece of parchment paper between layers to prevent sticking.
- Longevity: When stored correctly, these make-ahead lunch wraps will stay fresh for 3-4 days in the refrigerator. This makes them perfect for Monday through Thursday lunches!
- Freezing? Maybe: While some wraps can be frozen (especially those with dryer fillings like bean burritos), wraps with fresh, crisp vegetables and creamy spreads don’t tend to freeze and thaw well, as the veggies can become watery and limp, and the texture of the spread can change. For more ideas on how to keep your make-ahead meals, including sandwiches and wraps, stay fresh and delicious, you might find some useful tips on freezer meals for lunches.
Troubleshooting Common Issues
Even with the best intentions, sometimes things don’t go exactly as planned. Here are solutions to common issues you might encounter with make-ahead lunch wraps.
- Soggy Tortillas:
- Solution: Ensure you’re using a generous layer of the cream cheese/mayo spread as a moisture barrier directly on the tortilla. Pat dry any high-moisture vegetables like cucumber or tomato before adding them. Avoid ingredients that release a lot of water (like very ripe tomatoes) or place them in the very center, away from the tortilla.
- Wraps Falling Apart:
- Solution: The most common culprit is not rolling tightly enough. Start rolling from the edge closest to you and keep it taut. Also, make sure not to overstuff. Chilling the wraps for at least 30 minutes before eating helps them set and hold their shape better.
- Fillings Shifting:
- Solution: Again, tight rolling is key. The cream cheese spread also acts to “glue” ingredients in place. Make sure your ingredients are evenly distributed, not clumped in one area.
- Lack of Flavor:
- Solution: Don’t forget to season your fillings! A pinch of salt and pepper, a dash of herbs, or a squeeze of lemon juice can elevate flavors significantly. Consider adding a flavorful spread like pesto or a sprinkle of everything bagel seasoning.
- Dry Wraps:
- Solution: Ensure your creamy spread base is adequate. If your protein is dry (e.g., plain chicken breast), mix it with a little mayo, dressing, or even a touch of salsa before adding to the wrap.
- Tortillas Cracking When Rolled:
- Solution: Your tortillas are likely too cold or too dry. Let them come to room temperature for at least 15-20 minutes before assembling. You can also lightly warm them in a dry skillet or microwave for a few seconds to make them more pliable, but be careful not to make them crispy.
Nutritional Information per Serving
- Serving Size: 1 wrap (based on approximately 6-8 servings from the recipe)
- Calories: 350-400 kcal (highly dependent on specific brands and fillings)
- Protein: 20-25g
- Carbohydrates: 30-35g
- Fat: 15-20g
- Saturated Fat: 5-7g
- Fiber: 3-5g
- Sodium: 600-800mg (can be reduced with low-sodium deli meat and cheese)
- Key Nutrients: Vitamin A (from carrots), Vitamin C (from bell pepper), Calcium (from cheese), Iron, Potassium.
Disclaimer: Nutritional information is an estimate and can vary significantly based on specific ingredients, brands, and portion sizes. For precise values, it’s recommended to use a nutritional calculator with your exact ingredients.
FAQ
Q: Can I use different proteins in these make-ahead lunch wraps?
A: Absolutely! Feel free to experiment. Cooked shredded chicken, canned tuna, ham, roast beef, or even vegetarian options like hummus and falafel crumbles work wonderfully. Just make sure any meat is fully cooked and cooled before adding.
Q: How do I prevent my wraps from getting soggy with more watery vegetables like tomatoes?
A: The best way is to create a strong moisture barrier with a thick spread like cream cheese, hummus, or mashed avocado directly on the tortilla. If you must use watery veggies like tomatoes, pat them very dry with a paper towel and place them in the center of the wrap, surrounded by drier ingredients, and consume the wrap within 1-2 days.
Q: Can these wraps be frozen?
A: Generally, no. Wraps with fresh vegetables and creamy spreads do not freeze well, as the vegetables tend to become watery and limp upon thawing, and the texture of the cream cheese can change. These are best enjoyed fresh from the fridge within 3-4 days. However, for some inspiration on freezer-friendly make-ahead lunch options that are great for meal planning, you can explore resources like Thriving Home Blog’s make-ahead lunch wraps for different approaches.
Q: What are some good vegetarian filling ideas?
A: For vegetarian make-ahead lunch wraps, consider fillings like hummus with roasted vegetables (zucchini, bell peppers, onions), black bean and corn salsa with avocado, mashed chickpeas with a little vegan mayo and celery, or even seasoned crumbled tofu. Remember to still use a base spread to protect the tortilla.
Q: How long do these make-ahead lunch wraps last in the refrigerator?
A: When properly assembled and individually wrapped, they will stay fresh and delicious for 3-4 days. This makes them perfect for preparing on Sunday for a week’s worth of lunches!
Conclusion
There you have it – your ultimate guide to mastering make-ahead lunch wraps! We’ve covered everything from ingredient selection to smart storage, ensuring your meal prep success. These aren’t just convenient; they’re a commitment to healthier eating, saving money, and reclaiming precious time in your busy week. No more sad desk lunches or last-minute take-out decisions. With these tips and this recipe, you’re empowered to create delicious, fresh, and satisfying lunches that are ready when you are.
So, roll up your sleeves, gather your favorite fillings, and get ready to transform your lunch routine. You’ll be amazed at the difference a little planning can make! We’d love to hear how your wraps turn out and what creative fillings you come up with. Don’t forget to rate this recipe and share your experience in the comments below! If you loved this recipe, please consider sharing it on Pinterest or even sending a link to this page to a friend who also struggles with lunch prep. For the full, printable recipe card and detailed instructions, be sure to visit our dedicated make-ahead lunch wraps page! Happy prepping!