Easy Campfire Bread: Your Ultimate Braai Side! | by Tyla
Make perfect easy campfire bread and braai bread on a stick with this simple recipe. No special equipment needed – just flour, water, and your campfire for delicious outdoor baking!
Prep
15 min
Cook
15 min
Total
30 min
Servings
Multiple servings
Ingredients
Instructions
- 1
Find sturdy, green sticks about 1 inch thick and 2-3 feet long. Strip 6-8 inches of bark from one end for a clean surface.
- 2
In a medium bowl, combine self-rising flour with water and olive oil. Add optional savory ingredients if using.
- 3
Stir until shaggy dough forms, then knead for 2-3 minutes until smooth and pliable. Adjust with flour or water if too sticky or dry.
- 4
Divide dough into golf ball-sized portions. Roll each into a 10-12 inch long snake about 1/2 inch thick.
- 5
Lightly grease prepared stick ends with olive oil. Wrap dough snake around stick in spiral, pinching ends firmly to secure.
- 6
Let campfire burn down to glowing embers with minimal flames. Hold stick over embers, rotating slowly and continuously.
- 7
Cook for 8-15 minutes until golden brown outside and hollow when tapped. Check by sliding one piece off to ensure no raw dough inside.
- 8
Carefully slide cooked bread off stick. Let cool for 1-2 minutes, then serve immediately with butter, jam, or preferred toppings.
Notes
Tips for Success
- Warm, fluffy, slightly smoky treat
- Incredibly simple to make with pantry staples
- No special equipment required
- Perfect for outdoor gatherings and camping
- Versatile with sweet or savory options
Common Mistakes to Avoid
- Can burn easily if cooked over direct flames
- Dough may be too sticky or dry if measurements are off
- Bread may fall off stick if not properly attached
- Cooking time varies greatly with fire heat
- Requires patience and constant rotation
Nutrition (per serving)
180-220 kcal
Calories
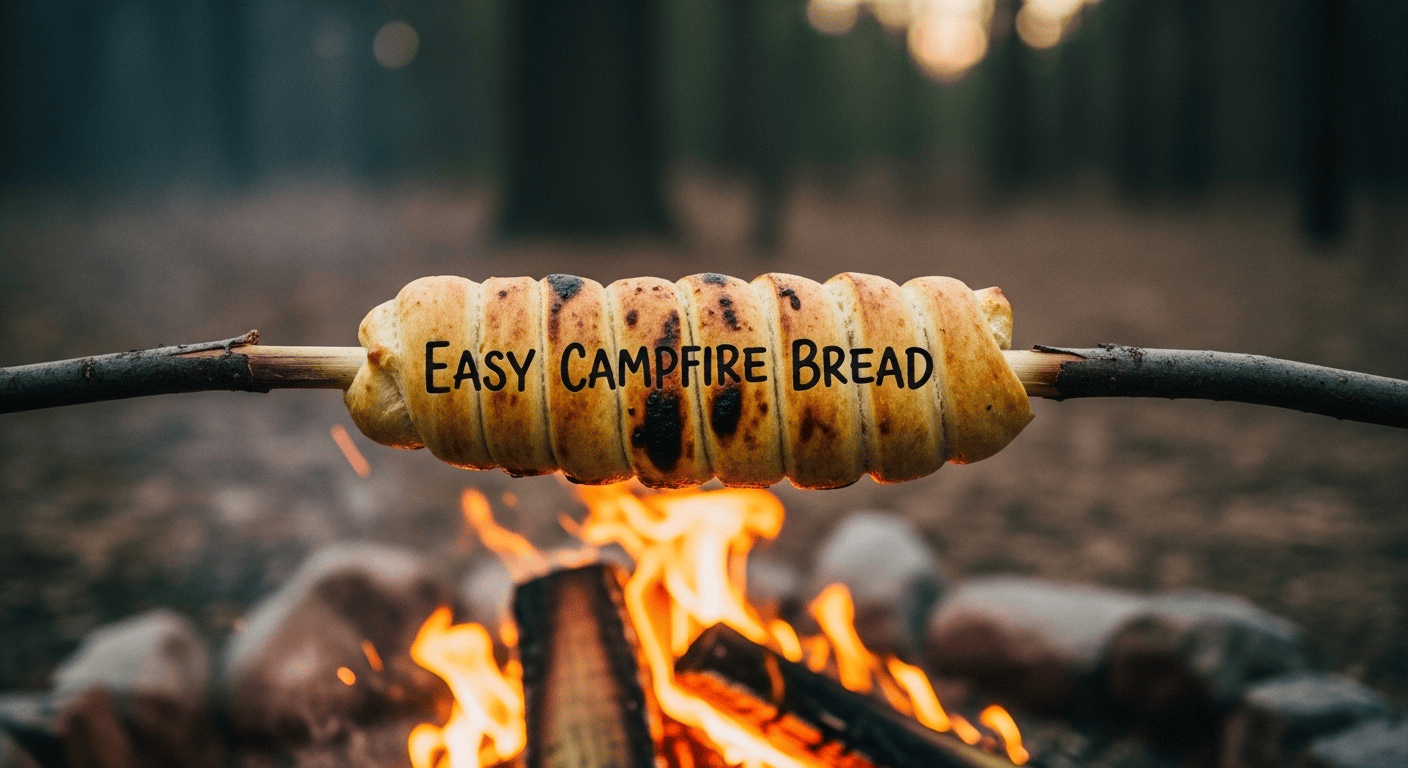
Are you ready to elevate your outdoor cooking experience? Imagine this: the crackle of the campfire, the scent of woodsmoke, and the irresistible aroma of freshly baked bread. That’s exactly what you get with this incredible easy campfire bread recipe. Whether you call it braai bread, dough on a stick, or simply campfire delight, this humble recipe is a game-changer for any outdoor gathering. It’s incredibly simple to make with just a few pantry staples, requiring no special equipment, and promises a warm, fluffy, slightly smoky treat that everyone will adore. Get ready to impress your friends and family with this ultimate braai side that’s as fun to make as it is to eat!
Ready to dive in? Here’s what we’ll cover:
Table of Contents
For a quick summary and printable version of this easy campfire bread recipe, you can jump directly to the full recipe card here!
Ingredients
This braai bread recipe is famous for its simplicity, using ingredients you likely already have in your pantry. We’re keeping things super basic to let that delicious smoky flavor shine through!
- 2 cups self-rising flour: This is our secret weapon for easy campfire bread! Self-rising flour already has baking powder and a bit of salt mixed in, meaning less measuring and fewer ingredients to pack. If you don’t have self-rising flour, don’t worry! You can easily make your own by combining 2 cups of all-purpose flour with 3 teaspoons of baking powder and 1/2 teaspoon of salt. For a simpler, more rustic dough that’s also great over a fire, you might even explore a basic flatbread recipe for campfire cooking as an alternative.
- 1 cup cold water: The exact amount might vary slightly depending on your flour and humidity, but start with 1 cup. Cold water helps prevent the dough from getting too sticky.
- 2 tablespoons olive oil (plus more for hands/sticks): This adds a lovely richness to the dough and helps it achieve that golden-brown crispness. A little extra for greasing your hands and the cooking sticks will prevent sticking.
- 1/2 teaspoon salt (if using all-purpose flour): If you’re using self-rising flour, you won’t need extra salt. If you’re making your own self-rising blend or just using plain all-purpose, add this for flavor.
- Optional add-ins: Get creative!
- Garlic powder or dried herbs: For a savory twist.
- Grated cheese: Cheddar or mozzarella works wonderfully for cheesy campfire bread.
- Cinnamon and sugar: For a sweet treat, perfect for dessert.
Timing
One of the best things about making easy campfire bread is how quickly it comes together, leaving more time for relaxing around the fire!
- Prep time: 10-15 minutes
- This includes gathering ingredients, mixing the dough, and shaping it onto your sticks. It’s quick, but worth taking your time to get the dough right.
- Cook time: 8-15 minutes per stick
- Cooking time will vary greatly depending on the heat of your fire, the thickness of your dough, and how close you hold it to the embers. Patience is key!
- Total time: 20-30 minutes for the first batch
- Once you get into a rhythm, you can continuously cook sticks as long as your fire is going.
Time-Saving Tips
- Pre-measure dry ingredients: Before heading out, measure your self-rising flour into a zip-top bag. When you’re ready to cook, simply add water and oil.
- Use sturdy sticks: Scout for good, clean sticks (about 1 inch thick and 2-3 feet long) beforehand. This saves time and frustration when you’re ready to cook. Hardwood branches like oak, maple, or fruit trees are ideal, but make sure they are green (fresh, not dead and dry) to avoid them catching fire and to make them easier to strip.
- Delegate roles: Get everyone involved! One person can mix the dough, another can find and prep sticks, and others can help with the cooking. It’s part of the fun!
Step-by-Step Instructions
Making easy campfire bread is a wonderfully hands-on experience, perfect for involving everyone in your group. Here’s how to do it:
- Prepare your sticks: Find sturdy, green (freshly cut) sticks that are roughly 1 inch thick and about 2-3 feet long. Carefully strip about 6-8 inches of bark from one end. You want a clean, smooth surface for your dough. This also prevents the bread from tasting like bark! You can also use specific campfire cooking skewers if you prefer.
- Mix the dough: In a medium bowl, combine the self-rising flour (or your homemade blend) with the water and olive oil. If you’re adding any optional savory ingredients like herbs or cheese, mix them in now.
- Knead briefly: Stir with a spoon until a shaggy dough forms. Then, turn it out onto a lightly floured surface (or just knead it gently in the bowl if you’re trying to minimize mess). Knead for just 2-3 minutes until the dough comes together and is relatively smooth. It should be soft, but not overly sticky. If it’s too sticky, add a tiny bit more flour; if it’s too dry, a tiny splash of water.
- Divide and shape: Divide the dough into golf ball-sized portions. Take one portion and roll it into a long ‘snake’ shape, about 1/2 inch thick and 10-12 inches long.
- Wrap the dough: Take your prepared stick and lightly grease the bark-free end with a little olive oil (or just water if you don’t want to use oil). Starting from the tip, wrap the dough snake around the stick, spiraling downwards. Pinch the ends firmly onto the stick so they don’t unravel. You want the dough to be thin enough to cook through, but thick enough not to burn immediately. Aim for about 1/4 to 1/2 inch thick on the stick.
- Find your cooking spot: Let your campfire burn down to a good bed of glowing embers. You want consistent, medium heat, not direct flames, which will just char the outside of your bread. The best spot is usually just above the embers, where you can feel strong heat but see few active flames.
- Cook the bread: Hold your stick with the wrapped dough over the hot embers, rotating it slowly and continuously. This ensures even cooking. The bread will puff up and start to turn golden brown.
- Check for doneness: Cooking can take anywhere from 8 to 15 minutes. The bread is done when it’s golden brown on the outside and sounds hollow when tapped. To be absolutely sure, you can carefully slide one piece of bread off the stick and break it open – it should be cooked through with no raw dough inside.
- Serve and enjoy: Carefully slide the cooked bread off the stick. It will be very hot! Let it cool for a minute or two, then serve immediately with your favorite toppings or just a dollop of butter.
Healthier Alternatives for the Recipe
Enjoying easy campfire bread doesn’t mean you have to sacrifice your health goals! Here are a few simple tweaks to make this outdoor treat a little lighter or to cater to different dietary needs.
- Whole wheat flour: Replace half or all of the self-rising flour with whole wheat self-rising flour (or make your own whole wheat blend with whole wheat flour, baking powder, and salt). This will add more fiber and nutrients, giving the bread a nuttier flavor and denser texture.
- Less oil: While a little olive oil adds richness, you can reduce the amount in the dough or omit it entirely if you’re really watching your fat intake. Just be sure to lightly oil your hands and the sticks to prevent sticking.
- Savory vs. Sweet: Skip the sugar and cinnamon and instead focus on savory herbs like rosemary or oregano, garlic powder, or even a sprinkle of chili flakes. These add flavor without extra sugar.
- Vegan options: This recipe is naturally very close to being vegan. Just ensure your flour and any optional add-ins are vegan-friendly. For inspiration on a fully plant-based approach, you might explore a vegan campfire bread on a stick recipe. It’s amazing how simple it is to adapt!
- Gluten-free flour blend: For those with gluten sensitivities, a good quality gluten-free all-purpose flour blend (one that includes xanthan gum) can often be substituted directly for the self-rising flour. You’ll still need to add baking powder and salt if your blend isn’t self-rising. The texture might be slightly different, but still delicious!
Serving Suggestions
Once your easy campfire bread is cooked to golden perfection, the possibilities for serving are endless! It’s incredibly versatile and makes a fantastic accompaniment to almost any outdoor meal.
- Classic butter and jam: The simplest and arguably most delicious way to enjoy it. Slather with butter (or garlic butter!) and your favorite berry jam or honey.
- Savory dippers: Pair it with hearty stews, chili, or grilled meats straight off the braai. It’s perfect for soaking up delicious sauces. Try dipping it in hummus, a creamy spinach dip, or even a simple olive oil and balsamic vinegar blend.
- Braai sides: This bread is the ultimate complement to any South African braai. Serve it alongside boerewors, marinated chicken, or juicy steaks. It’s much lighter than traditional bread rolls but just as satisfying.
- Cheese and chives: While still warm, sprinkle with fresh chives and a generous amount of grated cheddar or Parmesan cheese. The residual heat will melt the cheese into gooey goodness.
- Sweet treats: If you opted for cinnamon and sugar in the dough, consider dusting it with powdered sugar, a drizzle of chocolate sauce, or a dollop of whipped cream for a delightful campfire dessert.
- Alongside other campfire goodies: This bread is a great addition to a spread of outdoor-cooked dishes. If you’re looking for more fun and easy campfire recipes, you might also enjoy making some homemade corn dogs for another crowd-pleaser!
Common Mistakes to Avoid
Making easy campfire bread is straightforward, but a few common pitfalls can trip up even experienced outdoor cooks. Avoiding these will ensure your bread is always a success!
- Cooking over direct flames: This is the number one mistake! Direct flames will instantly char the outside of your bread, leaving the inside raw and doughy. Always let your fire burn down to a bed of glowing embers with minimal flames. This provides consistent, radiant heat needed for even cooking.
- Not rotating the dough: If you hold the stick still, one side will burn while the others remain pale. Rotate the stick constantly and slowly, ensuring every part of the bread gets equal exposure to the heat.
- Dough too thick or too thin: If the dough is wrapped too thickly, the outside will burn long before the inside cooks through. If it’s too thin, it might dry out and become brittle, or even fall off the stick. Aim for about 1/4 to 1/2 inch thick when wrapped around the stick.
- Not greasing the stick: Even with bark removed, dough can stick to the wood. A light coating of olive oil on the bare stick will make it much easier to slide the cooked bread off.
- Using flimsy or toxic sticks: Ensure your sticks are sturdy enough to hold the dough and endure the heat without breaking. More importantly, use non-toxic wood. Avoid unknown woods, and never use treated lumber. Green hardwood branches (like oak, maple, fruit trees) are best. Also, make sure they are clean and free of sap or fungi.
- Improper dough consistency: The dough shouldn’t be too sticky (hard to work with) or too stiff (results in dry, tough bread). It should be soft, pliable, and just slightly tacky to the touch. If you’re used to working with different doughs, like those for easy yeast dumplings, you’ll recognize the right ‘feel’ quickly. Adjust with a tiny bit more flour or water as needed during mixing.
- Impatience: Campfire cooking is slower than oven baking. Don’t rush the process. Let the embers do their work and enjoy the ritual. Trying to cook it too fast over high heat will only lead to disappointment.
Storing Tips for the Recipe
While easy campfire bread is absolutely best enjoyed fresh off the stick, you might find yourself with a few leftovers (though it’s rare!). Here’s how to store them, though we recommend making just enough to eat fresh.
- Cool completely: Before storing, make sure the bread has cooled down entirely to room temperature. Storing warm bread will create condensation, making it soggy.
- Airtight container: Place the cooled campfire bread in an airtight container or a zip-top bag. This helps prevent it from drying out.
- Room temperature: It can be stored at room temperature for up to 1-2 days. It won’t be as soft as when fresh, but it will still be edible.
- Refrigeration (optional): If you need to keep it longer, you can refrigerate it for up to 3-4 days, but the texture might become a bit chewier.
- Reheating: To revive leftover campfire bread, you can gently warm it in a dry pan over low heat, or even briefly over the embers of a dying fire (be careful not to burn it!). A toaster oven also works well. A quick sprinkle of water before reheating can help restore some moisture.
Troubleshooting Common Issues
Even with a simple recipe like easy campfire bread, things can sometimes go awry. Don’t worry, most common issues are easy to fix!
- Bread is burnt on the outside, raw on the inside:
- Cause: Heat too high (direct flames) or dough wrapped too thickly.
- Solution: Move your stick further away from the direct flames, or wait for the fire to die down to a bed of glowing embers. Ensure your dough is wrapped thinly enough (1/4 to 1/2 inch thick) to cook through. Rotate constantly.
- Bread keeps falling off the stick:
- Cause: Dough too dry, not pinched firmly enough, or stick not properly prepared.
- Solution: Make sure your dough is soft and pliable (add a tiny bit more water if too dry). When wrapping, really pinch the ends firmly onto the stick. Ensure the stick is smooth and clean, and lightly greased.
- Bread is dry and hard:
- Cause: Dough too dry to begin with, or overcooked.
- Solution: Next time, ensure your dough is soft and slightly tacky. Watch the cooking time carefully and remove the bread as soon as it’s golden brown and cooked through.
- Bread is sticky and hard to work with:
- Cause: Dough too wet.
- Solution: Add a tablespoon of flour at a time and knead until it reaches a manageable, non-sticky consistency. Lightly flour your hands before handling.
- Bread tastes smoky/bitter:
- Cause: Cooked over too much smoke, or stick wasn’t cleaned properly.
- Solution: Cook over glowing embers, not directly in heavy smoke. Ensure your sticks are clean, bark-free, and from non-resinous wood.
- It just won’t cook!
- Cause: Fire isn’t hot enough, or bread is too far from the heat.
- Solution: Stir up your embers to get a little more heat going, or move the bread closer to the heat source. Be patient – it takes time.
If you’re still looking for more tips and visual guidance on perfecting your campfire bread, there are many resources out there, like this helpful guide from Everything Ahnika on campfire bread on a stick.
Nutritional Information per Serving
Please note: This is an estimated nutritional breakdown for easy campfire bread made with basic self-rising flour, water, and olive oil, without any additional toppings or fillings. Actual values will vary based on exact ingredients, portion size, and cooking method.
- Calories: ~180-220 kcal
- Protein: ~5-7g
- Carbohydrates: ~35-40g
- Fat: ~2-4g (mostly from olive oil)
- Fiber: ~1-2g
- Sodium: ~300-400mg (from self-rising flour)
This bread is a wonderful source of energy for your outdoor adventures! Adding cheese will increase fat and protein, while whole wheat flour will boost fiber. Always remember to adjust for any additional ingredients or toppings you choose.
FAQ
Q: Can I make the dough ahead of time?
A: Absolutely! You can mix the dough, cover it tightly, and refrigerate it for up to 24 hours. Just let it come to room temperature for about 15-20 minutes before shaping and cooking. This is a great time-saver for your camping trip!
Q: What kind of sticks are best for campfire bread?
A: Look for sturdy, green (freshly cut, not dried out) branches that are about 1 inch thick and 2-3 feet long. Hardwoods like oak, maple, birch, or fruit trees (apple, cherry) are excellent choices. Avoid poisonous woods like oleander or elderberry. Always strip the bark from the cooking end and make sure the stick is clean.
Q: Can I bake this bread in an oven if I don’t have a campfire?
A: While the smoky flavor is part of the charm, you can definitely bake this dough! Roll the dough into small logs or rounds, place them on a baking sheet, and bake at 375°F (190°C) for 15-20 minutes, or until golden brown and cooked through. You won’t get the ‘on a stick’ fun, but you’ll still have delicious fresh bread.
Q: What if my dough is too sticky or too dry?
A: If it’s too sticky, add a tiny bit more flour, a tablespoon at a time, until it’s easy to handle. If it’s too dry and crumbly, add a teaspoon of water at a time until it comes together into a soft, pliable dough. The right consistency is key for success.
Q: Can kids help make campfire bread?
A: Yes, this is a fantastic recipe for getting kids involved! They can help mix the dough, roll it into “snakes,” and wrap it around the sticks. Always supervise closely around the fire, and assign them tasks appropriate for their age and comfort level with heat.
Conclusion
There’s something truly magical about cooking over an open fire, and this easy campfire bread recipe brings that magic to life. It’s more than just food; it’s an experience, a memory in the making, and a delicious reward for your outdoor efforts. Simple ingredients, minimal fuss, and a whole lot of flavor – that’s what this braai bread is all about. So, next time you’re planning a camping trip or a backyard braai, remember this recipe. It’s guaranteed to be a hit, leaving everyone with warm hearts and full bellies. Gather your loved ones, light that fire, and get ready to enjoy the simple pleasure of homemade bread, cooked right in the heart of nature.
Don’t forget to share your campfire bread creations with us! Leave a review below or tag us on social media. And if you loved this recipe, please share it on Pinterest to inspire more outdoor cooking adventures! Happy camping and happy baking!